
Introduction to Felt Roofing
Definition and Basic Components of Felt Roofing
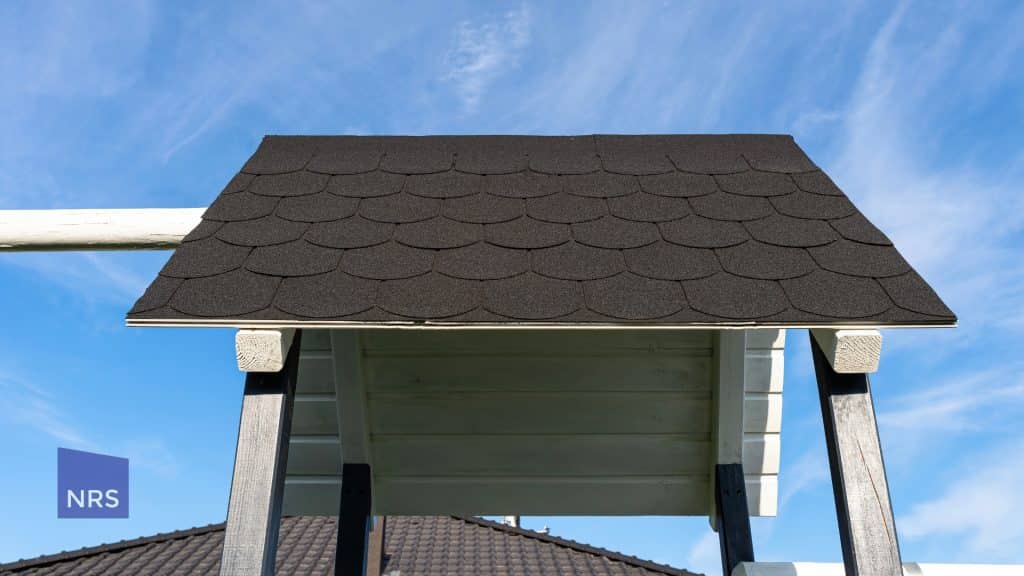
Felt roofing, also known as roofing felt or felt paper, is a protective layer installed between the roof deck and the shingles. This underlayment serves as an additional line of defence against moisture, contributing to the overall durability of the roofing system. Felt roofing is composed of a base material, typically made from wood cellulose or synthetic fibres like polyester or fibreglass. This base is then coated with a waterproofing agent such as bitumen (asphalt), which helps to repel water while still allowing breathability.
History and Continued Relevance in Modern Construction
Roofing felt has a significant history, dating back to its more regular use in the 1930s. Originally, roofing felt was made from thin building paper. Over the decades, the technology and materials have evolved, but the fundamental purpose of felt roofing—providing an extra layer of protection—remains the same.
Today, felt is still utilised not only because of its cost-effectiveness but also for its reliable performance in various weather conditions. Modern construction continues to rely on felt roofing as a viable roofing solution due to these enduring qualities. Contemporary building codes and organisations such as the National Roofing Contractors Association (NRCA) also often recommend the use of roofing felt to ensure an additional layer of protection.
Common Applications in Residential and Commercial Buildings
Felt roofing is a versatile material used in both residential and commercial buildings. In residential constructions, it is commonly used as an underlayment beneath asphalt shingles, providing a waterproof barrier that protects the roof deck from moisture damage. It also helps to create a more uniform surface for the installation of shingles, which aids in achieving a clean and even finish.
Commercial buildings also benefit from the use of felt roofing, particularly those requiring additional layers of protection against harsh weather conditions. For instance, felt underlayment offers superior wind and water resistance, making it ideal for regions prone to heavy rain or snow. Moreover, in cases of ice dams or severe weather events, felt can act as a secondary barrier, significantly reducing the risk of leaks and internal water damage.
The application of felt is not limited to large residential or commercial projects. It is also a popular choice for smaller constructions such as sheds and garages, where it provides a cost-effective solution to waterproofing needs.
This comprehensive introduction to felt roofing sets the stage for understanding the various types of felt materials and their respective benefits and limitations. Moving forward, it is important to delve into the specifics of the materials used, and how they impact the overall performance and lifespan of a roofing system.
Types and Materials
Different Weights of Felt
Roofing felt comes in various weights, with the most common being 15-pound (15 lb) and 30-pound (30 lb) felt. The numerical value refers to the weight of the material per 100 square feet. A lighter 15-pound felt is generally used for its cost-effectiveness and is suitable for roofs with a standard pitch. It’s often referred to as an economic choice due to its affordability and ease of installation. However, for steep sloped roofs, 30-pound felt is preferred due to its higher tear resistance and greater durability during installation.
Organic vs Synthetic Felt Materials
Roofing felt can be made from organic or synthetic materials. Organic felt is traditionally composed of cellulose (wood debris) that is saturated with asphalt. This type of felt is water-resistant but not entirely waterproof. Organic felt tends to be less durable over time compared to synthetic options.
Synthetic felt, on the other hand, is manufactured from synthetic polymers such as polypropylene or polyethylene. These materials provide a high strength-to-weight ratio, enhanced resistance to UV rays, and better moisture resistance. Synthetic underlayment is more durable and typically lasts longer than their organic counterparts, making them a popular choice for modern roofing projects.
Multi-Layer System Composition
A multi-layer felt roofing system typically includes multiple layers of felt, each with a specific function. The composition usually involves:
- Base Sheet: This initial layer provides a foundational surface onto which subsequent layers are applied.
- Reinforcing Layers: Intermediate layers consist of reinforced felt or fabrics that offer additional insulation and flexibility.
- Cap Sheet: The top layer, often coated with mineral granules or other finishes for added protection and aesthetic appeal.
An example of such a setup is the three-layer felt system used in flat roofing, which consists of a vapour control layer, a reinforced felt layer, and a final cap sheet layer. This configuration ensures a watertight and durable roofing solution suitable for various building types.
A careful selection of materials and consideration of the roof’s specific requirements can greatly influence the longevity and performance of felt roofing.
The next essential step in ensuring the durability and reliability of felt roofing is its proper installation and maintenance. Transitioning from understanding the materials to effective application will highlight the importance of precision and care in safeguarding the structural integrity of the roofing system.
Benefits and Limitations

Advantages
Felt roofing offers a range of benefits that make it an appealing choice for many homeowners and commercial property owners. The first notable advantage is affordability. Roofing felt is one of the most cost-effective solutions available, which makes it attractive for budget-conscious consumers. Its components, typically consisting of wood cellulose or synthetic fibres coated with waterproofing agents, are comparatively inexpensive. This makes the initial installation, as well as any necessary repairs, more financially manageable.
Another significant advantage is the material’s water resistance. Felt roofing acts as an effective barrier against water infiltration. The asphalt coating on the material prevents water from penetrating the roof structure, thereby reducing the risk of water damage and the potential for mould and mildew growth, which are common concerns in moist environments.
Ease of installation is another reason why felt roofing remains popular. Its heavy-duty rolls can be laid out straightforwardly, and the non-slippery surface aids workers during the installation process, even in wet conditions. This ease of installation not only reduces labour costs but also shortens the time required to complete a roofing project. As a result, felt roofing can be installed quickly and efficiently.
Limitations
However, despite these advantages, felt roofing comes with a set of limitations that prospective users should consider. One of the primary drawbacks is its shorter lifespan when compared to modern alternatives like EPDM (Ethylene Propylene Diene Monomer). While a well-maintained felt roof can last between 15 to 20 years, this is notably less than the 30 to 50-year lifespan that EPDM can offer.
Extreme weather conditions can also negatively impact the durability of felt roofing. For example, high temperatures can cause the felt to warp, while cold weather may make it brittle. Additionally, repairs to felt roofing can often appear untidy if not executed properly, diminishing the aesthetic appeal of the roof. In regions prone to severe weather, these limitations become even more pronounced as felt roofing struggles to maintain its integrity under harsh conditions.
Typical Lifespan
The typical lifespan of felt roofing falls within the range of 15 to 20 years with proper maintenance. Key factors influencing this lifespan include the quality of the installation, the type of felt used (organic or synthetic), and the prevailing weather conditions. Regular inspections and timely repairs are crucial in extending the life of a felt roof. Simple maintenance tasks, such as ensuring proper ventilation and applying protective coatings, can help mitigate some of the wear and tear that naturally occurs over time.
As we move forward, understanding the proper installation process will be key in maximising these benefits while mitigating the limitations of felt roofing.
Installation Process

Proper Preparation of Roof Surface and Weather Conditions
Before beginning the felt roofing installation, it is crucial to properly prepare the roof surface and account for weather conditions. A clean, dry roof surface ensures that the felt adheres properly and performs optimally.
- Clean the Roof Surface: Remove all debris, including leaves, twigs, and any loose or damaged shingles. The surface should be smooth and free from any obstructions.
- Check for Damage: Inspect the roof for any signs of damage or wear, such as cracks or holes. Repair any identified issues to prevent future leaks.
- Consider Weather Conditions: Ideal weather for installing felt roofing is dry and mild. Avoid installation during rainy, snowy, or extremely windy conditions, as these can affect the adhesion and positioning of the felt.
Step-by-Step Layering Process Starting from Bottom to Top
The felt installation process involves a step-by-step layering method, starting from the bottom and working your way up to ensure proper water runoff.
- Install Drip Edge: Begin by placing a drip edge along the eaves and rakes of the roof. This prevents water from seeping under the felt and damaging the roof deck.
- Lay the First Layer of Felt: Starting at the bottom edge of the roof, roll out a section of felt horizontally. Ensure the felt is aligned straight and overhangs the edge by about 1/2 inch.
- Fasten the Felt: Use roofing nails or staples to secure the felt in place. Fasteners should be placed every 6-12 inches along the edges and 12-18 inches along the center.
- Overlap the Next Layer: Continue by rolling out the next layer of felt above the first, overlapping it by 2-4 inches. This overlap is crucial for preventing water infiltration.
- Repeat the Process: Continue this process, layering and fastening each section of felt, until you reach the top of the roof. Ensure each layer is securely fastened and properly overlapped.
Correct Overlap Measurements and Fastening Techniques
Achieving the correct overlap measurements and fastening techniques is essential for the longevity and effectiveness of felt roofing.
- Overlap Measurements:
- Horizontal overlaps should be between 2-4 inches.
- Vertical overlaps, where two sections meet side-by-side, should be at least 6 inches.
- Fastening Techniques:
- Use corrosion-resistant roofing nails or staples.
- Fasteners should penetrate through the felt and into the roof decking to ensure stability.
- Apply fasteners every 6-12 inches along edges and 12-18 inches along the centre for secure attachment.
The correct application of overlap measurements and robust fastening will enhance the durability and weather resistance of the felt roofing.
Proper installation of felt roofing is integral to its performance and longevity. Following these steps and techniques ensures a well-protected roof capable of withstanding various weather conditions.
Felt comes in several forms. For the modern flame-bonded option, see our guide to built-up felt roofing, and if you are weighing felt against a seamless alternative, our comparison of torch-on felt versus hot melt breaks down the differences.
Maintenance and Care

Proper maintenance is critical for the longevity of felt roofing systems. A regular inspection schedule, attention to common issues, and preventive care can help maintain the integrity of your roof and prevent costly repairs.
Regular Inspection Schedule and Key Checkpoints
Felt roofing requires routine inspections to detect and address potential problems early. Ideally, inspections should be conducted twice a year — in the autumn and spring — when weather conditions are more stable and conducive for thorough evaluation. Additionally, flat roofs may need more frequent inspections due to their vulnerability to water pooling.
During inspections, focus on the following key checkpoints:
- Roof Surface: Look for cracks, tears, or punctures that may compromise the waterproofing layer. Areas around seams and joints are especially prone to damage.
- Nails and Fasteners: Ensure they are secure and not rusted or corroded, which can occur with inferior materials.
- Flashing and Sealants: Check around roof penetrations like chimneys, vents, and skylights for any gaps or degradation of sealants.
Common Issues to Watch For
Tears and Punctures
Tears and punctures are common issues with felt roofing, often caused by debris or weather conditions. They can be easily repaired with roofing cement or adhesive and felt patches.
Blistering
Blisters form when air or moisture gets trapped between layers of felt. They often indicate underlying issues with the installation or weatherproofing.
Water Leaks
Leaks are a frequent problem, particularly on flat roofs. Causes include poor installation, aging, and damage from heavy debris. Inspect the interior ceilings for water stains or signs of mould growth, as these may indicate a leak in the felt roofing.
Debris Removal and Preventive Maintenance Tips
Debris Removal
Keep the roof surface clear of leaves, branches, and other debris. Accumulated debris can trap moisture and expedite the deterioration of the felt material. Use a brush or blower to remove debris regularly, especially after storms.
Preventive Maintenance Tips
- Clean the Roof: Gently scrub away moss, algae, or mildew using water and a mild detergent. Avoid high-pressure washes that can damage the felt.
- Proper Ventilation: Ensure adequate airflow to prevent moisture buildup, which can lead to mould growth and compromise the roof structure.
- Check for Signs of Damage: Regularly inspect for loose or missing felt and apply roofing cement to small cracks or tears. For extensive damage, consider hiring a professional.
Investing time in regular maintenance and vigilant inspections will help ensure that your felt roofing provides long-lasting protection.
Professional Installation vs DIY

Required Tools and Materials for Installation
When it comes to installing felt roofing, having the correct tools and materials is crucial for ensuring a successful and durable installation. The essential tools required include:
- Utility knife with roofing blades
- Hammer or pneumatic nail gun
- Stapler and staples
- Measuring tape
- Chalk line
- Roofing nails or staples appropriate for the thickness of the felt
- Roofing adhesive or cement
- Ladder
- Safety gear (gloves, safety goggles, harness if working on steep roofs)
For materials, a standard felt roofing project will need a variety of items, including:
- Roofing felt rolls (15-pound or 30-pound depending on specific requirements)
- Roofing nails or staples
- Drip edges for the roof perimeter
- Roofing cement or adhesive
- Underlay and additional layers if part of a multi-layer system
When to Call a Professional vs Attempting DIY
Installing felt roofing on your own is feasible but requires a moderate level of skill and caution. Here are some factors to help you decide whether to tackle the job yourself or call a professional:
- Scope of the project: Small-scale repairs or simple overlays can often be managed by competent DIY enthusiasts. For larger projects, structural repairs, or extensive roof coverings, enlisting professional help is recommended.
- Experience and comfort: If you have prior experience with roofing projects and feel comfortable working at heights, then DIY may be an option. For those without such experience, it is safer to seek professional expertise.
- Tools availability: Professionals have access to specialised tools that ensure a precise and effective installation. If you lack these specific tools, consider hiring a contractor who will come equipped.
- Time constraints: Professional roofers can complete the installation more rapidly and efficiently through their extensive experience. If time is of the essence, a professional team can deliver prompt results.
Importance of Proper Installation for Longevity
Proper installation is paramount to maximise the lifespan and performance of felt roofing. Accurate and careful procedures during installation significantly reduce the risks of premature failure and leaks. Key aspects of proper installation that contribute to longevity include:
- Weather Conditions: Ensure that installation is done in dry weather conditions to avoid trapping moisture below the felt layers, which can lead to mould and deterioration.
- Surface Preparation: A clean, dry, and debris-free roof surface is essential to ensure proper adhesion and function of the felt layers.
- Layering and Overlap: Correctly following the step-by-step layering process and ensuring adequate overlaps between the felt sheets prevents water ingress and wind uplift issues.
- Secure Fastening: Using the correct type and number of fasteners appropriate for the roof structure and felt weight maintains the integrity and stability of the roofing.
Incorrect installation techniques or mistakes can lead to significant issues such as leaks, material failures, and reduced lifespan, necessitating costly repairs or replacements. Therefore, thoughtful consideration should be given to whether the project is a suitable DIY task or if it warrants professional intervention to ensure optimal results and longevity.
Felt roofing requires diligent maintenance and appropriate installation practices. Properly understanding and assessing these aspects enables homeowners to make well-informed decisions to either engage qualified professionals or competently perform DIY projects.
